Showing posts with label Apothescary. Show all posts

Saturday, June 2, 2012

Recent Projects

I've been constructing away at projects I need for a demo I'll be doing at the end of June at the Airport Sewing Center. That's where the Hula Doll embroidery originates from, in essence, and the embroidery is the focus of the art, and here it is shown with designs from the Hula Dolls collection.

Hula Doll Embroidery with Mylar Fiber Skirt shown as a Wall Hanging. The pattern can also be modified to make a 16" Pillow.
 In the side garden

Studio shot: Shown with embroidered flip-flop (bottom right) and Seed Bead Starfish pins

Standard-Size Pillowcases, Hula Dolls collection

 Origami Fabric Hawaiian Shirts


Fabric scraps torn into strips and knit

Standard-Size Pillow case using the Bottles and Hocus Pocus (glow-in-the-dark) prints from APOTHESCARY and a trim of Glow-in-the-Dark Fairy Frost

Shave Ice Bucket Hats reverses to corduroy with reverse seams

Friday, February 17, 2012

APOTHESCARY Glow-in-the-Dark Halloween Collection

An ongoing challenge that has been presented to me is to fill a void in the market for boy themed prints. Naturally it came to me that most boys somehow end up with a chemistry set or other such present as a gift. So when considering a new halloween group - a category that I could design all year long - I thought it would be fun to do a Mad Scientist-based group for all of the aspiring doctors, nurses, medical technologies and pharmacist boys and girls (and men and women) in your life.


As you will notice when reviewing the prints, I have purposely designed the group 1). to appeal to both a younger and older audience (the latter being a definite asset since most halloween prints currently in the market are geared to juveniles and this group definitely has an adult appeal), 2). for both boys and girls of all ages and 3). most of the prints transcend a strictly halloween genre. For example, the Apothescary print is a year round laboratory print, as is the Spooky Spots. The Lightning Stripe and Hocus Pocus can be blended into a wizard or dungeons and dragons group. I see it that it is my job to provide you with the most versatile designs possible, allow you to be creatively inspired and let your imagination run wild....!

;) P.S. The design numbers designated DG and Glow, Glow-In-The-Dark! How cool is that?

APOTHESCARY
Halloween Collection by Mark Hordyszynski for Michael Miller Fabrics
Apothescary (DC5277-Black)

The Dr. Is In (DC5251-Green)

Spotted Spooks (DG5245-Glow)

Boo! (DG5256-Glow) Boo! (DC5256-Pumpkin)

Bottles (DC5253-Black)

Lightning Stripe (DC5252-Pumpkin)

Spooky Spots (DC5252-Dalmation) Spooky Spots (DC5252-Kiwi)

Spooky Spots (DC5252-Kryptonite) Spooky Spots (DC5252-Kiwi)

Spooky Spots (DC5252-Pumpkin) Spooky Spots (DC5252-White)

Hocus Pocus (DG5257-Glow)

My aspirations for this group are quite high... at the 2011 Fall International Quilt Market in Houston this past October, the Michael Miller sales reps were writing orders on this group almost one year to date in advance as the last day of the show was Halloween. I hope you're as excited about these designs as I am!

In addition to the designs on fabric as seen above, I have a license for Machine Embroidery Collections with THE NEEDLEWORK FACTORY and the Apothescary bottles are available as a Full Collection on a disc, or as Individual Bottle Design Kits. Please refer to the right sidebar for a direct link to the page.


The main outline of the bottle is stitched out on the background fabric. Then the contents of the bottle are placed within the stitched lines, followed by a piece of clear plastic overlaid on top of the embellishments. Lastly, the satin stitch outlines of the bottle sew over the first stitched outline, embroidering the plastic to the background fabric. The buttons, provided by Just Another Button Company, are glued down. The glitter and confetti is loose and moves around the stationery buttons when turned, shaken or rattled. They are very clever, very unique!

Here the Apothescary embroideries are stitched out on a white lab coat as shown for the 2011 Fall International Quilt Market in Houston.

Wednesday, February 1, 2012

The Adventures of DA BONE

Aloha!

I am going to post a fabric - design - work related entry every Wednesday so keep checking back as I relay some of the goings-on of the past year, and get you up-to-date on what can be expected in the coming year.

I was thrilled when Kathy, co-owner and Head Stylist of Michael Miller Fabrics, agreed to allow me to display my new Halloween group APOTHESCARY at Quilt Market in Houston this past fall. It's a nine-piece collection of prints geared for the little mad scientist in all of us, and our junior chemists and pharmacists in the family. The great aspect of the collection (from a merchandising standpoint) is that the group transcends the frightful holiday and individual designs can be placed in other categories. Here's the link to the collection on the Michael Miller Fabrics website:

http://www.michaelmillerfabrics.com/MMF/Swatch4.cfm?&Gnam=Halloween

Also, all of the designs in the
Halloween category are mine, and it's going to get bigger as I have a few more patterns which I am shooting to debut at the Spring Quilt Market in Kansas City this year.

Once I got the okay to proceed, the process of designing my space began. I, at first, wanted to do a mad scientist's lab - stone walls, bubbling beakers, etc. but it just didn't settle with me 100% - there seemed to be something lacking. Then I remembered that MMF had 2-color damask patterns in an array of combos, so I hoped to find one in red-and-black... BINGO! And better yet, there was one in a black ground with a charcoal grey metallic design. This what it!! Suddenly Sweeney Todd meets the Addams Family meets Dark Shadows came to mind and the design of the booth was born.

As a designer I'm always saving pages from magazines that are inspiring, and years ago I came across a project technique in one that took newspaper, formed into the basic shape of a bone, and then was covered in plaster coated gauze bandage (similar to what would be used for a cast). The article also showed a very large bone resting against a wall, and it was then that I knew I was destined to create this dino-sized femur.

So, the process began. I enlisted the help of a couple of my very talented and artistic friends Keri and Penny. What do we use for the inside armature? How to we make it rigid and shippable yet light enough not to be cost prohibitive? Plaster vs. foam? Soon, the answers came to us.

The long portion of the bone would be wire window-screen stuffed with air bladders used for shipping. How big should we make it? I don't know... let's use the entire roll of the screen (approximately 7'.) The ends would be papier-mache balloon shapes, held together with glue and masking tape. The entire structure would be covered with strips of muslin soaked in plaster of paris.

DA BONE

Pre-Production: Paper-mache globes (Penny trying them on for size), roll of wire window screen.

After the center was wrapped with the fabric-and-plaster strips, the ends of the screen were slit and the globes attached to the ends of the bone. Here's Keri who was fearless about making a mess and getting her hands dirty.


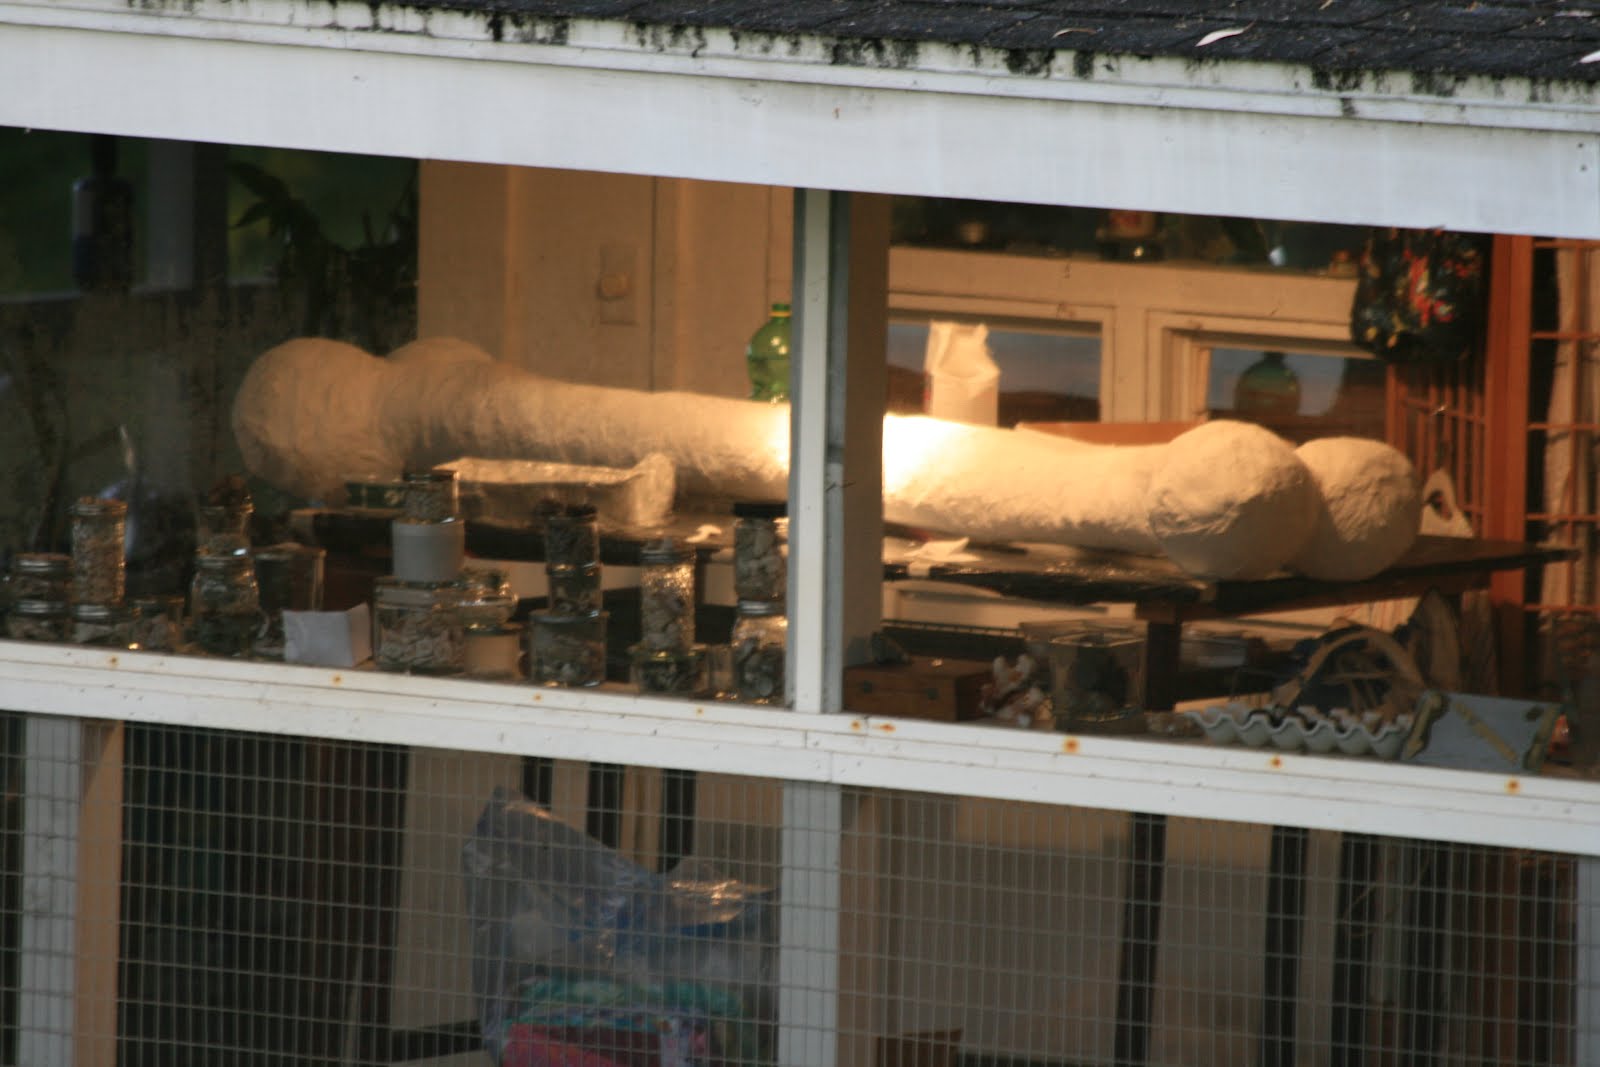
The bone, drying, on my design table (the table is 60" long.) Photo taken one morning from outside of the lanai where my office and studio is located. It was finally sealed with gesso and tea-stained to give it an aged appearance.

Fitting the bone in its cardboard casing for shipping. I wrapped it in bubble wrap, and Penny suggested using insulation foam in a can to secure it even further. Brilliant packing idea!


The bone arrived safe and sound in Houston. It was my second piece of checked luggage for the $25.00 luggage fee (it measured 7'3" packed and weighed 25 pounds.) You should have seen the spectacle I caused at the airport checking this in!


Unwrapping the bone at the convention center.

The bone on display in my APOTHESCARY space in the Michael Miller Booth. The black-and-charcoal metallic damask fabric was adhered to the walls using liquid starch. The picture frames display the fabric collection, and strangely enough, most of the props in the booth are things that I own and have collected over the years :/
And thus ends the saga of the 6'9" plaster-of-paris and fabric bone's journey from Haiku, Maui to Houston, Texas. It now lives snuggled in it's packaging in a warehouse in New Jersey.