Showing posts with label Michael Miller Fabrics. Show all posts

Thursday, August 14, 2014

Chroma

My new collection

is a tribute to color
presented in simple silhouettes


Color Hue Rainbow Original Masterful Abstract


evoking a modern, urban renaissance


free form rectangles and circles akimbo and askew


primitive, rough-handed vertical ragged stains


 droplets etching meandering, shape-shifting paths


Used together or separately
they’re graphically focused to embolden your artistic sensibilities


can be viewed by clicking above, 
and the free download of


For the men's shirt I used the selvage with my name for the label and color windows as a trim on the bottom front placket. 
No two buttons are identical.

Cotton Couture in Brite White worked wonderfully for the pillow cases both in having a soft hand and it sews so effortlessly.

Hope you are as excited with the new collection as I am!

Happy Stitching!
Mark

Sunday, March 16, 2014

Brite and Busy Quilt by Marinda Stewart

A number of weeks ago I published the post:Graphyx, Tangram and Disco Dot, in which I shared the four new colorations of Tangram (which was originally released in black-and-white)and Disco Dot.

Michael Miller Fabric's premiere quilt designer Marinda Stewart was given the task of choosing one pair of the color combinations to create an original quilt. She took the story of Tangram full circle (mine is I designed a quilt top for my contribution to the Mirror Ball Dot challenge which I ran last year, and then revised it to be the print design Tangram), and Marinda did the same, only in reverse, by taking the fabric design and creating a central pieced panel for her Brite and Busy Quilt.

Once again Marinda has created an OMG incredible quilt. 

The instructions will be offered as a free download on the Michael Miller Fabric's website in the near future.

Tuesday, May 14, 2013

BEADWORK by... ME! Quilt Market Debut Preview


A while back I published a post previewing my BEADWORK collection that is to debut at the Spring International Quilt Market in Portland, Oregon. Well that happens this week. You can read that post here: I'm So Excited!

Following are thumbnail images of the full collection shown in their color stories, and preceding those, are quilts and handbags that were designed using the collection.

First is probably the most brilliant quilt design I have ever encountered. It is constructed using ONLY 14 seams! Designed by my dear friend, mentor and cohort, Marinda Stewart, she said that she wanted to pay tribute to the fabric itself, showcasing the fact that I had spent almost 2 weeks and 5500 carefully placed beads by hand (in Photoshop) to create the focal print (center vertical band). The strips are fussy cut so they line up perfectly and are in a specific color placement and rotation.
This quilt, called Beaded Mosaic, will be available as a free download 
on the Michael Miller Fabrics website.

And these are the same quilt in each of the 3 color combinations available.

This quilt, designed by the very talented artists of Quiltwoman.com created what I call a mashup of the three color stories creating a beautifully intricate and perfectly balanced quilt in its chaotic blend of patterns and color. This is, as I understand, a Bargello quilt (where one sews strips of fabric together and then cuts the pieced cloth into strips and off-sets them as they are resewn together to form the quilt top).


I created these little clutch purses from an online pattern and revised it to be used with the lighter weight quilting cotton and these are super cute when lined with MMF's


In a week or two I'll post a tutorial on how to make these fun accessories. Once you get the hang of 'em, you can make one from start to finish in about 40 minutes and make sure you have extra frames on hand as they are addictive to make!


Multi:
DC5782 Primitive - Multi
(Shown selvage to selvage)

DC5783 Peyote Flower - Multi

DC5784 Blanket Chevron - Multi

DC5785 Beaded Colorband - Multi


DC5786 Diamondback - Flame, Emerald, Sunshine

   
DC5782 Primitive - Earth


DC5783 Peyote Flower - Earth

DC5784 Blanket Chevron - Earth

DC5785 Beaded Colorband  - Earth

        
DC5786 Diamondback - Gray, Maize

          
DC5786 Diamondback - Sienna, Adobe


JEWEL:

DC5782 Primitive - Jewel

DC5783 Peyote Flower - Jewel

DC5784 Blanket Chevron - Jewel

DC5785 Beaded Colorband - Jewel

       
DC5786 Diamondback - Mineral, Turquoise, Amethyst


Saturday, April 27, 2013

Jamie Mueller our 1st Mirror Ball Dot Enthusiast


Jamie Mueller, from St. Louis, Missouri, is our first Enthusiast to post a project for the Mirror Ball Blog Hop. Hint: I know she has several projects to post ;)

To be fair to Jamie, she's not just an enthusiast - she is a dotty fanatic of Mirror Ball Dot. She has a great history with the fabric and a very personal attachment to it. 

For many people like me, designing fabric is a business. And being in business one needs to be sensitive to certain things (to name a few): trends in color, size and motifs, timing of a release of a fabric, inventory, when something has run its course and needs to be discontinued.

Discontinue Mirror Ball Dot? Well... Jamie wouldn't have it. 

So she rallied other lovers of the design and started a petition... and an exact quote from the ring leader....

"Okay ya'll,
I spoke with the President of Michael Miller Fabrics and BEGGED him to reprint the Mirror Ball Dots because they are AMAZING! I asked if a petition would help and he said yes! So please if you have photos of this fabric upload it and SIGN the petition! I started this POST (discussion). Just leave a comment saying you will sign and I will create a list and email him!! We can do it, he seemed VERY willing to reprint if I got a lot of people involved! :) Thank you so much!! We can do it!!" 

October 2010

And perhaps I should just leave it at: And the rest is history...

Check out what Jamie has done for the Mirror Ball Blog Hop by visiting her blog at:

  Jamie Mueller / Sunflower Quilts - www.jamiemueller.blogspot.com

And don't forget to leave a comment to enter to win one fat quarter of Mirror Ball Dot in your choice of 5 colors and a Mirror Ball Dot color card. There are 6 more chances to win!

The winner of the prize from last week's comments on my blog is:

Linda!
April 21, 2013 at 11:54 AM

Congratulations!

Please send me your mailing address and the 5 colors of MBD that you would like to receive to: markhordyszynski@mac.com 

You can find them by visiting the Michael Miller Fabrics website direct link here:

Now, let's hop along to Jamie's blog and see what she's going to reveal on Sunday.

Saturday, April 20, 2013

So... Let the Hop Begin!


This is an exciting moment. A few months of coordinating, telephone calls, emails, mailing packages and great conversations have lead to this... the Mirror Ball Blog Hop.

I can guarantee that this will be informative, inspiring and creatively stimulating. We're also going to become well acquainted before we're through. I hope it's going to be like a great book or a movie series - for when it comes time to end we're sad because we spent so much time together and it's time to say, "Aloha."

With this first post the Blog Hop is officially launched. The concept was to get six designer/artists/bloggers - all Mirror Ball Dot enthusiasts - to work with the new color palette that was released last year. I limited the participants to four fat quarters of Mirror Ball Dot and one-quarter yard of 3 colors of Michael Miller Fabric's Cotton Couture. They were sent 1 yard of each color of Cotton Couture and were allowed to use their discretion in using it but just the same, I tried to limit what they were allowed to work with. The backing, batting, binding or other incidental materials were left to their choosing.

Over the next 8 weeks we're going to share ideas, thoughts and tips on working with the shimmery, glimmery, pearlized, iridescent geometric fabric call Mirror Ball Dot.


Each MBD Enthusiast will post on their respective blogs, so you're going to have to "hop" around, and at each stop you'll have an opportunity to win a Mirror Ball Dot color card and one Fat Quarter of 5 colors of your choosing of Mirror Ball Dot fabric. This week for my post it's real easy to win! Simply leave a comment and a winner will be chosen at random. Winner to be announced in next Sunday's blog post.


April 21:  Mark Hordyszynski - Launch of the MBD Blog Hop and his project
April 28:  Jamie Mueller / Sunflower Quilts - www.jamiemueller.blogspot.com
May 05:   Linda Solovic - http://lindasolovic.blogspot.com
May 12:   Karen Neary - http://sewkaren-lycreated.blogspot.com
May 19:   Elisa Albury - http://stitchoutsidetheditch.com
May 26:   Dory Smith Graham - http://worthygoodstextile.wordpress.com
June 02:  Nanette Zeller - www.NanetteSewZ.com
June 09:  Mark Hordyszynski - Close of the MBD Blog Hop / More MBD Inspiration / Judging for Blog Hop Winner              

So, without further ado, here is...
Pieced Tapa                          

Tapa in Hawaiian is a paperlike cloth. The designs are typically geometric: squares, triangles, diagonal and criss crossing lines, curves forming pointed ovals and 4-leaf clover shapes.

I chose: 4 FQs of Mirror Ball Dot in Onyx, 2 x 1/4 yards of Cotton Couture in Soft White and 1/4 yard in Lava. In addition (with the exception of the Lava C.C.) I was going to alter both fabrics before using them in my piece.

There are two basic methods for altering fabrics: Discharge - the removal of color from a fabric - and Dyeing/Painting - the addition of color to a fabric. Both are explained below.

Pieced Tapa (20" x 30")

Mirror Ball Dot: Onyx

Cotton Couture:
Soft White (tie dyed); Lava

Siren Song: Sunset


Here are two examples of using Mirror Ball Dot with discharge and dyeing (or in this case spattered dye could be called painting).

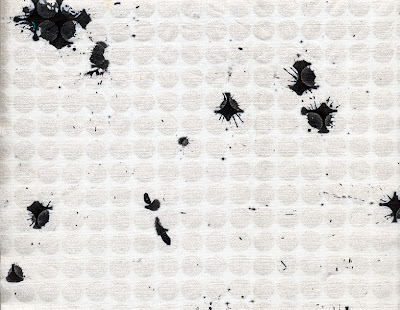
Snow MBD overdye-spattered with black India ink using an eye dropper - a perfect compliment to the metallic-pearl dot.

Choose a paint or dye that is suitable for the fabric you have selected, and follow the manufacturer's directions for use.

Always test a sample piece of fabric before engaging in the bulk of your project. This helps determine whether your materials are compatible and allows you to get a feel for working with your
technique.
                                                                                                                
Onyx MBD discharged using bleach (or a specially formulated product) to remove color from a fabric. This technique, even more than dyeing, is unstructured and tends to be unpredictable but very fun and  gratifying. 

Different fabrics discharge differently, and many factors determine the outcome, all of which come to play in the end product. Here, bleach is applied to the cotton fabric, and the fabric is placed in the sun. The bleach saturated areas will fade and discharge the color. Things to consider: Are you using 100% bleach, 50% bleach / 50% water, or some other combination of bleach and water? Is it a bright, sunny day or slightly to mostly overcast? Dark colors show better contrast than light colors do. Be assured that whatever circumstances prevail, your results will be unique for that piece of fabric.

Please note: Do avoid using chlorine bleach on any synthetic fiber; the damage is irreversible.

The discharged Mirror Ball Dot shown was done many years ago, was part of my stash, and I was looking for an excuse to finally use it. Ergo, I'd use it in this project!


So that was decided. The Cotton Couture I planned on tie-dyeing for a look and colors that were a modern interpretation of actual tapa cloth. I needed it to be done fast and efficiently with guaranteed professional results - and that is why I turned to my good friend Meriah of Meriah's Maui Dyes - my go-to gal for all things dyed. Of specific note to all you dyers out there: She said of tie-dyeing the Cotton Couture: It dyed better and nicer, with high saturation of dye and color, than some PFD cottons available in the market!

Meriah did a wonderful job and I couldn't wait to get it home to see it next to the MBD discharge.

I barely got through the front door and the two fabrics were out on my work table lying next to one another and... (Home Alone face) - CLASH! The discharge process turned the black background of the Mirror Ball Dot fabric a dark, deep, rich brown-black and there wasn't enough contrast between it and the tie dye - luckily I still had the yard of Onyx so that got thrown into the arena instead.

It wasn't until I was piecing the top together that I decided to throw in a curve ball - something I like to do - adding a sense of the unexpected - so I worked in one of my favorite colors and shades of orange - that fiercely intense warning orange (or as Pantone would have it - Tangerine Tango) to throw the top off kilter slightly, and the quilting came to me in my unrestful sleep that same evening. 


The binding - Siren Song in Sunset - was chosen because again, it's that great shade of orange striped with purples, and I had a piece that was just large enough to cut binding strips from.


Painting and Dyeing:

Supplies:
100% cotton fabric         Fabric paint or dye of your choice          Eyedropper for spatter
Bristle or foam brush for painting             Protective Gloves          Covered work space

Spatter:
1. Fill an eyedropper with paint or dye. Slowly and carefully squeeze a single drop from the eyedropper onto the fabric. (The further away from the fabric the bigger the "splat".) First work in a circular motion across the fabric, and then in a grid pattern, manipulating the drops to cover the surface of the fabric to your liking.

2. Allow the dye to set or the paint to dry according to the manufacturer's directions. Heat set as needed by ironing on the wrong side of the fabric.

Paint:
1. Paint the color onto the right side of the fabric with a bristle or sponge brush. Dilute paint and dye to produce a softer watercolor look with feathered edges. Undiluted dye or paint will produce solid color with very little bleeding.

2. Allow the dye to set or the paint to dry according to the manufacturer's directions. Heat set as needed by ironing on the wrong side of the fabric.


Discharging: 
The conditions described are an ideal scenario. Adapt as needed to your particular situation.

Supplies:
100% cotton fabric for discharging          Squeeze bottle with a very narrow tip
Bleach          Hydrogen peroxide          Bucket of warm, soapy water     Protective gloves

1. Gather all supplies in a centralized place, in a bright, sunny spot.

2. Place the fabric right side up in the sun. If you are concerned about damaging your work area, protect it with plastic.

3. In a bucket, mix 1 cup of hydrogen peroxide to 1 gallon of warm, soapy water.

4. Put on gloves and fill the squeeze bottle half-full with bleach or a diluted solution of bleach and water to your preference. Then drip, squirt, squeeze or dribble the bleach (or mixture) onto the fabric. When it has been covered sufficiently, stop. The sun and bleach will react immediately and lighten the color of the fabric.

5. After the desired discharged effect or lightness has been achieved (after no more than 5 minutes), put on gloves, and plunge the fabric into the peroxide bath to neutralize the bleaching reaction. Soak for 20 minutes.

6. Rinse the fabric thoroughly in clean water. Machine wash the discharged piece of fabric with soap and liquid fabric softener on a gentle cycle. Dry on lowest temperature.


Monday, April 1, 2013

Seed Bead Starfish

I'm the Featured Designer for Fairfield Processing this month!

You won't find these beauties at the beach, but luckily you can make them for yourself in a rainbow of colors.


Seed Bead Starfish are easy to make using scraps of fabric. Mix and match fabrics for the tops and bottoms to create your own individual color and pattern combinations. My favorite fabrics are some with surface interest, such as Michael Miller's Fairy Frost designed by yours truly! :) Or make them very modern and use Mirror Ball Dot!!

These brightly colored starfish seem to be jumping for joy and can be used to adorn a wide variety of projects. On pillows they add a cluster of sparkle here and there. Add a clasp and use to keep your scarf closed, or pinback as jewelry for a lapel or hat brim. Fill a glass bowl with starfish to use as a centerpiece or add a braided loop to decorate packages or as ornaments. Glue a magnet on the back and use it to post notes on the refrigerator or a suction cup for a window display. The possibilities are endless!

These are addictive to make and when it comes time to glue on the beads, the process reminds me of decorating cookies with colorful sugar crystals.

Click here to download the free pdf for the project.

Sunday, March 24, 2013

Mirror Ball Dot at QuiltCon

Here's a scan of the ad that Michael Miller Fabrics ran in several publications that were distributed at QuiltCon last month.

This quilt is available as a free download on the Michael Miller Fabrics website and was designed by Marinda Stewart.


Saturday, March 23, 2013

My Sister's Quilt or I've Drunk the Kool-Aid and I Feel Fine

When my sister, Dana, was here to visit last year for Thanksgiving, I told her I was going to make her a quilt as her Christmas gift. I also added the clause that I would not have it done on time to wrap and place under the tree, and she was okay with the stipulation.

During her stay we went through most of the fabrics I have in my stash and picked out contenders. As we travelled around the island like we always do, we popped into every fabric shop on the island to buy fabrics that could supplement what we already had chosen. (And please don't think this was an extensive undertaking; I can count the number of shops on one hand, and that is 5 if you include Walmart as a fabric store!) We both gravitated like moths to a flame to these two new fabrics from Michele D'Amore's Tropical Sun-Kissed collection. This pattern was one that I admired so much it had me wishing I had designed it myself and the one print, in two sizes, became the basis of the quilt.


So I now have to admit that I have drunk the Kool-Aid and I feel fine. It was so refreshing to work with fabrics with a white ground and having dived into the whiteness of the Modern Quilt Guild mentality, I can truly see the excitement in the concept. I was so taken with the idea that the backing is of Michael Miller's Cotton Couture in soft white with a small pieced stripe strategically placed down the center. I also bound the quilt in snow Rock Candy. (Oh, and I also discovered that I need to take some classes and learn how to shoot white objects in a white room with full late-afternoon Maui sunshine. I had to readjust these images to get the colors to pop the way they should but they are not over-exaggerated - the colors are all wonderfully saturated pastels.)


I find it more fun to take on the challenge of working with triangles, to match the pieces to get the points dead on perfect, so I use very large triangles (12" wide at the base x 13" high from the bottom to the apex of the point) in my bed quilts.


From the scraps I made two standard-sized pillow cases - soft white with Tropical Sun-Kissed trim and this pieced decorative pillow. The other fabric that seemed to be part of the backbone of the quilt is my Siren Song. You'll notice it mixed in regularly and I love the way it just seems to be a natural color bridge to pull all of the other fun prints together!